Category Archives: Photo Gallery

How to successfully propagate Gracilis Bamboo from cuttings

NOTE: If you are after the bamboo and shitty neighbours story, you can read everything about it on the ‘dear neighbour’ website.


How to successfully propagate Gracilis Bamboo from cuttings you ask me?

Well, it’s been a long and winding road, full of potholes of despair… but after more than 4 years, I can finally say I have learnt how to successfully propagate Gracilis Bamboo from cuttings.

Here is the proof – this is a cutting that I successfully managed to root at the end of 2014, early 2015. See the roots coming out of the bud?

IMG_6804-2

I have since managed to successfully propagate 8 out of 8 cuttings this year. Once  you know the trick, it is quite easy to grow your own cuttings of Bambusa Textilis Gracilis.

The two diagrams below show in detail 1) When to take a Gracilis cutting and 2) How to plant the Gracilis cutting.


When to take Bambusa Gracilis cuttings?

When to take Bambusa Gracilis cuttings?

how-to-plant-bambusa-gracilis-cutting

  1. Make sure you take a cutting from a mature culm, one that is over 12 months old.
  2. The culm diameter is important in the sense that it will hold water to feed the new cutting while it attempts to grow roots to survive. Use a culm where the inner diameter (the hollow part of the tube) is greater than say 7mm, so it can hold plenty of water.
  3. Take the cutting 3 to 4 inches above and below the culm node.
  4. Make sure there is one main branch coming out of the node and the size of the “bud” is large and looks healthy as this is the point where the roots will grow from.
  5. Take the cutting around the full moon phase. The moon affects the earth in many ways. In Bamboo, the moon’s gravitational pull draws sugars and starches from the roots and rhyzomes up the culm to help new leaf growth. These nutrients provide energy for the generation of leaves and fresh branches at the node of the cutting.
  6. Remove all small branches and leaves from the node – but leave the main nodal branch as this will be the cutting”s lifeline once it grows leaves.
  7. Plant the culm in a large pot with potting mix (large pot is good to avoid disturbing young plants during transfer).
  8. Use root hormone on the bud.
  9. Place the culm almost parallel to the ground (approximately 20 to 30 degrees to the ground) and ensure the main branch sticks up out of the soil, but the bud is well placed under the soil.
  10. Place the pot in a shady spot. I placed some pots at the base of the parent plant so its “new” environment hadn’t been changed.
  11. Water the pot on a daily basis for 4 weeks.
  12. Make sure the inside of the culm is full of water at all times.
  13. This process should completed during the warmer months to give your bamboo the best chance of growth.
  14. All that bamboo wants to do is survive and grow, this will best be achieved when there is high humidity and warmer temperatures.

One of the keywords that constantly keeps popping up in my statistics is “Gracilis Growth Rate”.

I would also like to crush any and all myths about this and set some facts straight.

  1. When planted from a cutting, Gracilis will do pretty much nothing the first 12 months. It will be sorry looking stick in the ground growing roots and a few small branches and leaves.
  2. The following 12 months, it will send some new small culms up – these will be the diameter of a pencil (maybe even smaller). The culms will grow to a height of approximately 2 metre or so and still look a bit sorry.
  3. After the first 24 months, things become interesting, and gracilis now throws some culms up to approximately 3 metres in height – but this depends on factors such as the size of the container, how much fertiliser/nutrients have been provided and how much water has been provided.
  4. Now you have a thick and dense Gracilis grove… the next year, you will see new culms that may reach the maximum height. The lower half of the plant will start to defoliate as the upper half grows most, if not all of the leaves.
  5. Gracilis is great for “all-round” privacy the first couple of years, but once it has matured, leaves only appear on the upper half of the culms. So it is great to block out a two storey window, but not ground levels. That is why I am planting some Malay dwarf bamboo in conjunction with my Gracilis… So if  you want ground floor privacy from your dear neighbour, I would suggest looking at a different type of bamboo.

Anywho, that’s all from me for now, follow these guidelines, good luck and let me know how you went!

I look forward to hearing from you :)

Henry Gomez aka Papa Gomez.

Making homemade wine using homemade wine press

Making homemade wine using homemade wine press – that is the name of this story.

A few years ago (7 years to be precise), I planted a number of red Muscat cuttings that were taken from my parents’ residence. Fast forward to 2016, these plants have endured the 2011 floods, the 2014 major hail storm, Indian Myna bird attacks and a number of dry seasons. I built a trellis so the vines could grow and provide much needed shade. I also added a number of other varietals including Muscat Gordo Blanco, Ribier, Shiraz, Flame grape, and Globe Grape. The only crop that has really been fruitful is the original Muscat. Maybe the other plants are too young to bear fruit, but I will give them a good trim this winter to encourage further growth.

I picked 100 litres of Muscat grapes this season, and put them in two 60ltr vats and let them ferment for 10 days. The ultimate objective is to make homemade wine so I had to make sure that temperature and fermentation speed was closely watched.

I also bought a French Oak Barrel made from French “full grown oak” timber – the oak gives colour, flavour, tannin profiles and texture to the wine as it ages. I know it’s the real deal because it has this stamp:

chene haute futaie

I also built a wine press from scratch, and saved myself over AU$700 in the process. The base is made of concrete which I poured into a 44 gallon drum. I used an old Acrow Prop to make the threaded shaft, and a Stainless steel tubing as the spout. It needs some legs and a ratchet mechanism which I will be preparing before next year’s harvest…

The timber staves are made of Merbau screening timber, and I used 40mm x 3mm galvanised flat bar for the frame structure. The gap between the staves is very important – if the gaps are too tight you will have difficulty pressing out the must, and if they are too far apart, the pomace will ooze out the sides of your homemade winepress. M6 cup-head bolts were used to hold everything together. The homemade wine press worked like a charm and we were able to squeeze out approximately 75 litres of burgundy gold (this left us with roughly 40 litres of pomace).

The process of making homemade wine is quite simple, and you don’t need a lot of fancy machinery if you’re doing this at home. The grapes already have the sugar and yeast you need for fermentation to take place. It does make the job easier if you have some “machinery” and measuring instruments, but it’s not primordial. I have to say that this was a lot of fun, and I’ll be doing it again next year – I also feel a great sense of pride in continuing an old family tradition. I’ll provide an update once I have tasted the wine in a few months – hopefully it doesn’t turn to vinegar!

Santé!!

Plantswap revisited and revamped

Plantswap revisited and revamped – Like the title says, and after spending over 12 months of my own personal time and finance, I have finally revamped the Plantswap website. It is now bigger and better than ever before! Well, not really bigger, or at least not until people start using it and posting photos of plants they are looking to buy, looking for free, want to get rid of, or want to sell.

I have added some new functionality and a lick of paint.

  • Members can now add photos of their plants and a map marker of the location of the plant on the map of Australia.
  • To maintain privacy, users can now post their plants by suburb only (rather than having the full address or personal details showing), and communication is all done through an internal messaging app – so their email address is safe.
  • New social interaction functionality has been introduced including member profile (you can upload photos of your garden), following of members, internal messaging, ratings of plant Ads, Member reviews and Badge system.
  • The map of Australia shows member’s plants and the location of the plant.
  • You can search for plants by category, location, or plant name.
Plantswap - For plantlovers and greenthumbers.

Plantswap – For plantlovers and greenthumbers. Australia’s first, free online website dedicated to plantswapping.


Plantswap member profile to show off your goodies, and talk a little bit about yourself.

Plantswap member profile to show off your goodies, and talk a little bit about yourself.

Plantswapping is easy!

Adding a new plant advertisement on Plantswap is straight forward and easy.

Grill on wheels

Grill on wheels

Grill on wheels

Grill on wheels – if you Google these words, you’ll probably end up seeing some hotted up cars with big fat “grills” and massive shiny rims. If that’s what you were looking for, then I congratulate you.

On the other hand, if you were looking for something to roast meat on, that has a certain level of mobility then you probably ended up here.

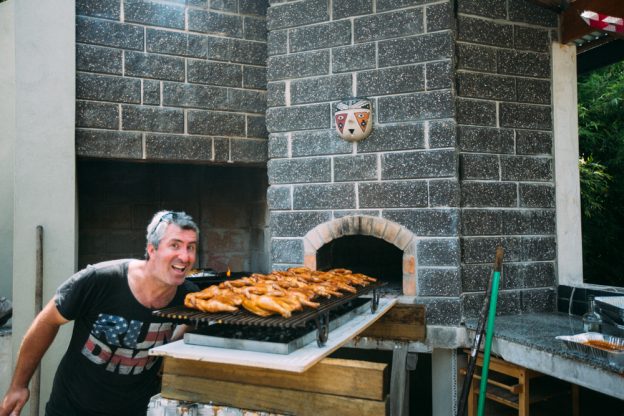
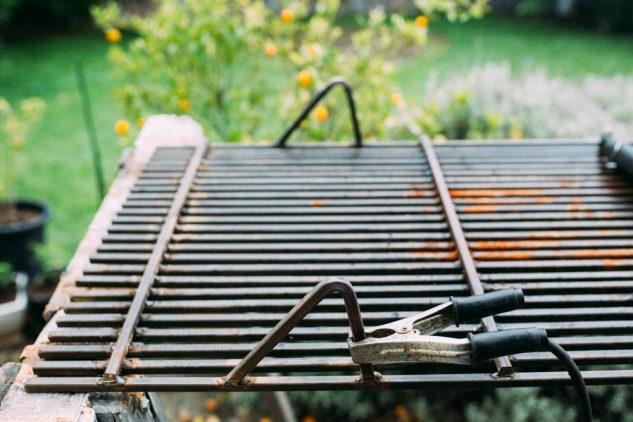
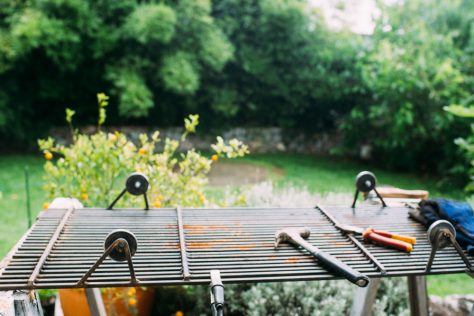
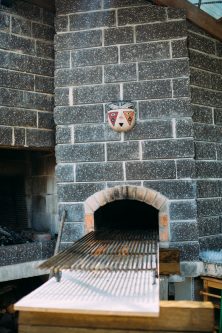
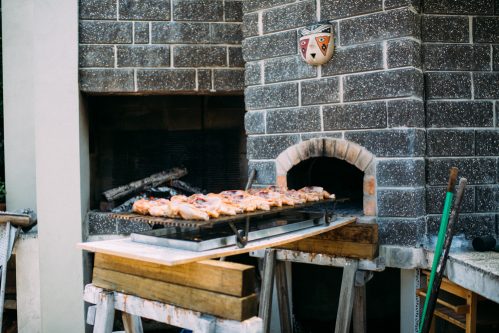
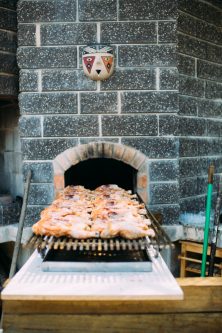
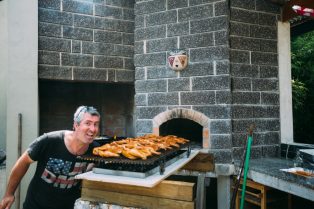
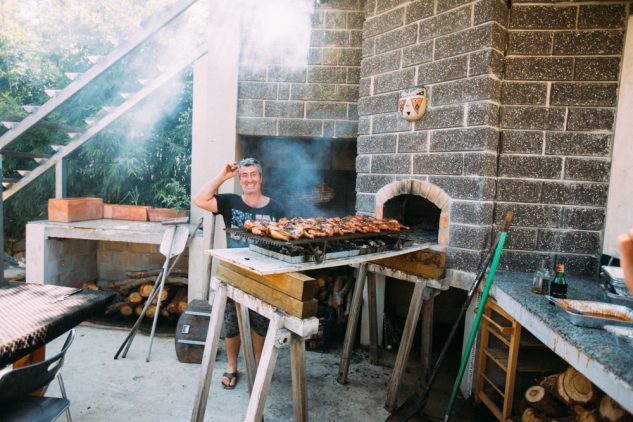
The grill on wheels was an idea that came to me after I made a grill for the WFO that I used for roasting a pig in the WFO. When I pushed the grill into the oven, it scratched the surface of the bricks and made my teeth grind at the same time. So I came up with this simple idea to easily insert and extract the grill from the wood fired oven.

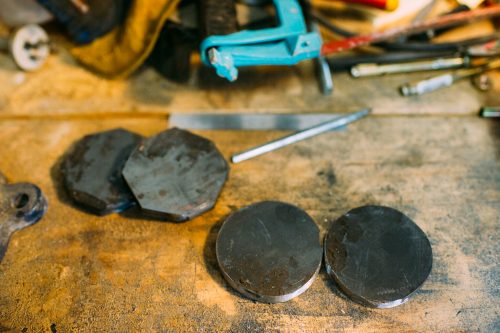
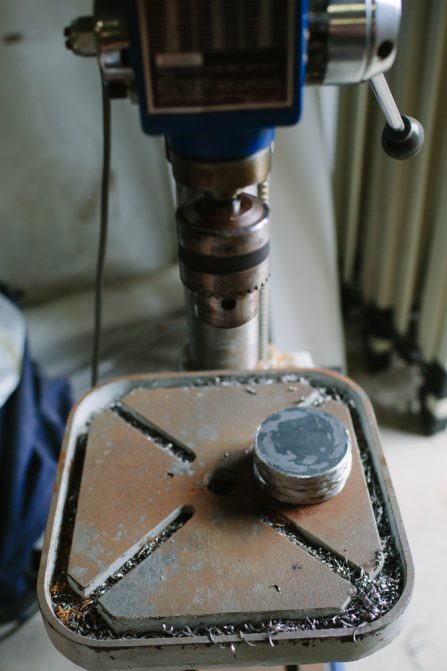
The wheels are made from solid steel flat bar that I cut into squares, then transformed into circles. They are attached to the grill by bolts that were welded to the grill’s ‘feet’. If you have mild steel square bar (10mm x 10mm), some flat 10mm x 75mm bar and 4 M10 nuts and bolts (and know how to weld), then the grill on wheels concept is quite easy to put together. Here are some photos showing the build process  and then the grill on wheels put into action. I certainly hope you enjoy these, as much as I enjoyed eating the Peruvian charcoal chicken that came out of the oven!